5+ Fun Uses of Digital Brushes
graphics by greene edition, Marisa Lerin, Jessica Dunn
Digital brushes are becoming increasingly popular in digital scrapbooking. Here are 5 ways to use digital brushes in digital scrapbooking:
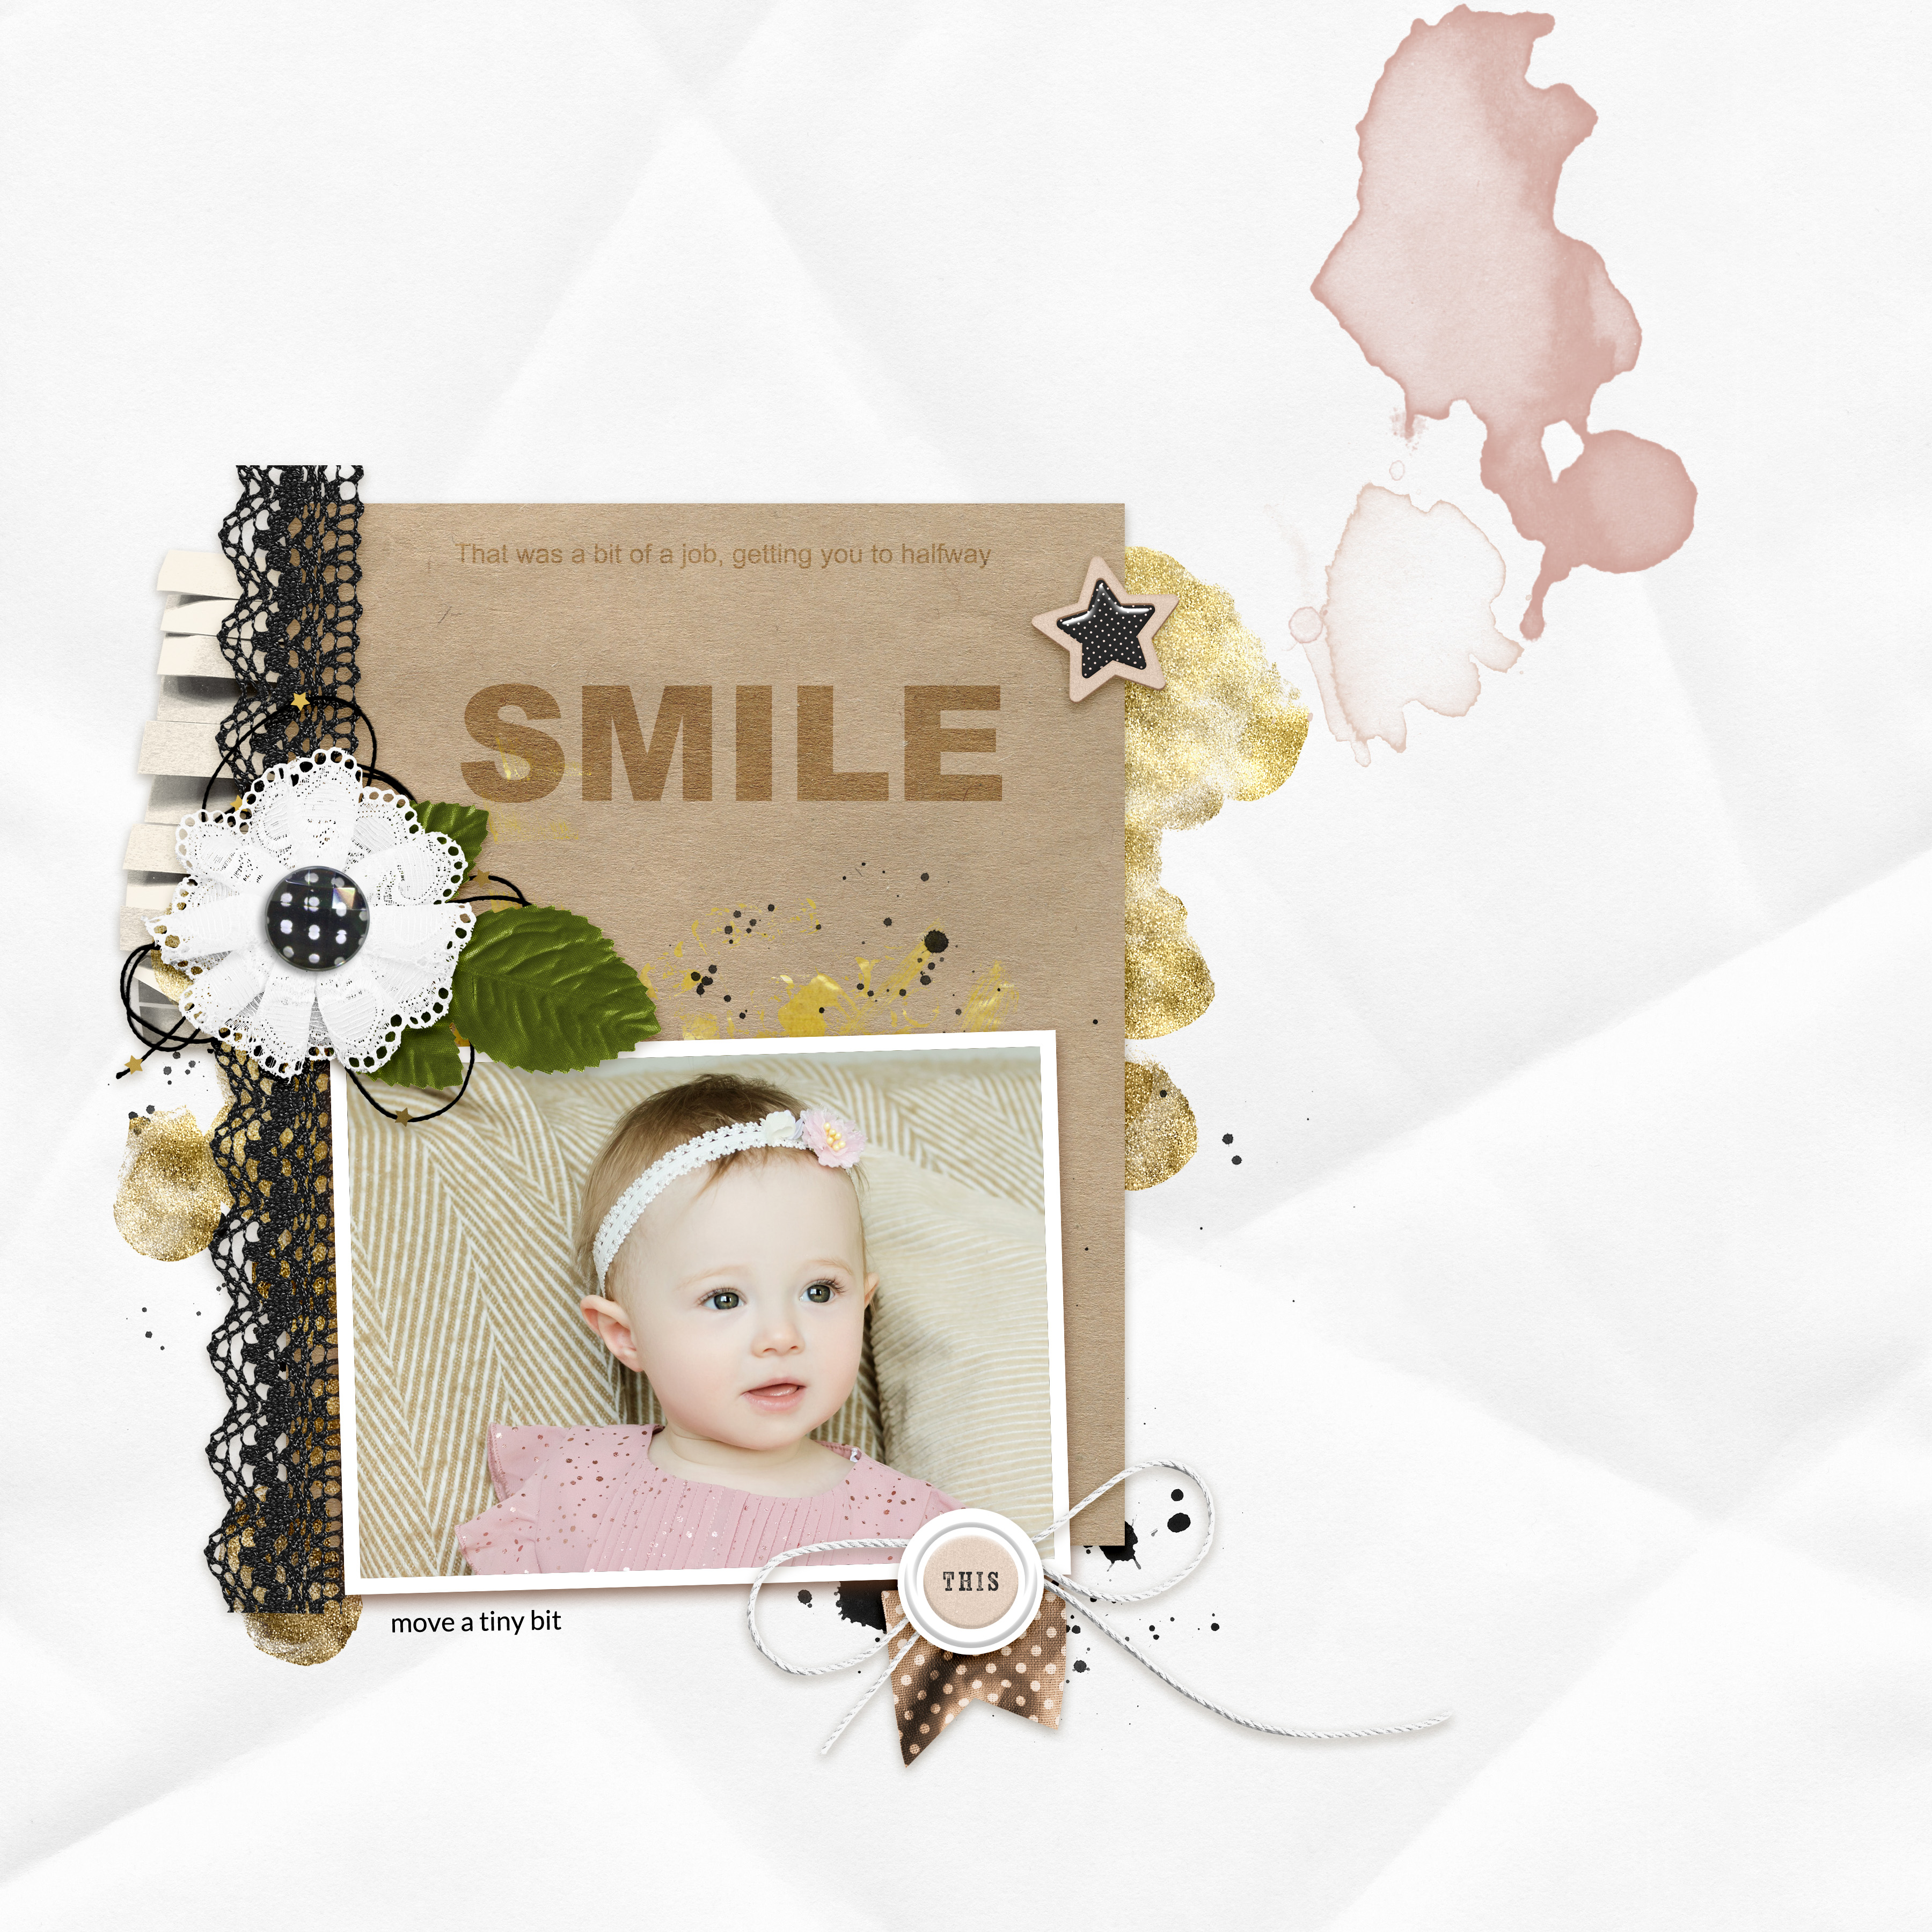
1. Add digital brushes to your page layouts to add a bit of dimension and interest.
2. Use digital brushes to create embellishments for your scrapbook pages.
3. Use digital brushes to create background papers for your scrapbook pages.
4. Use digital brushes to create journaling blocks or strips for your scrapbook pages.
5. Use digital brushes to create borders for your scrapbook pages.
Digital brushes are a great way to add interest, dimension and personality to your digital scrapbook pages. With so many different ways to use them, digital brushes are a must-have in any digital scrapbooker’s toolkit.
1.Use pressure to create different effects 2.Layer colors to create a unique look 3.Use two colors at once for a more dimensional look 4.Create a custom brush 5. Experiment with different brush settings 6. Use a brush to add texture 7. Use a brush to add a finishing touch
1.Use pressure to create different effects with Digital Brushes in Digital Scrapbooking
Digital brushes come in a variety of shapes, sizes, and colors. When used correctly, they can add a unique and beautiful touch to your digital scrapbook pages. Here are five ways you can use digital brushes to create different effects:
1. Use pressure to create different effects One way to use digital brushes is to vary the pressure you apply to them. This can create different effects, such as making the brush appear broader or thinner. Applying more pressure can also make the brush’s color appear more saturated.
2. Use different strokes Another way to create different effects with digital brushes is to vary your strokes. For example, you can use small, circular strokes to create a softer effect, or longer, straighter strokes to create a more bold look.
3. Create a custom brush If you want to create a truly unique look, you can create a custom brush. To do this, you’ll need to use an image editing program to create a brush shape that you like. Once you have your custom brush, you can use it like any other brush.
4. Use a texture Adding a texture to your digital brush can give it a more realistic look. To do this, you’ll need to find an image of a texture that you like and apply it to your brush.
5. Use a layer mask If you want to use a digital brush on only part of an image, you can use a layer mask. A layer mask is an image editing tool that allows you to hide or reveal parts of an image. This can be useful if you want to use a digital brush to add a frame to an image, for example.
2.Layer colors to create a unique look
Itemizing five ways to use digital brushes in digital scrapbooking omits a great deal of useful information about the topic. It’s like saying “Here are five ways to use a hammer” without discussing the different types of nails, or how to avoid smashing your thumb.
The goal of this article is to provide a more comprehensive guide to using digital brushes in digital scrapbooking, with a focus on layering colors to create unique looks. One of the great things about digital scrapbooking is the vast array of colors and textures that can be achieved with the simple click of a button. When it comes to layering colors, there are endless possibilities for creating unique and beautiful scrapbook pages. Here are just a few ideas to get you started:
1.Create a color scheme. Before you start layering colors, it can be helpful to create a color scheme to guide your choices. There are a few different ways to do this. You can choose colors that complement each other, or colors that create contrast. You can also use a monochromatic color scheme, using different shades of the same color. Once you have your color scheme, you can start experimenting with layering different colors.
2. Use a gradient map. A gradient map is a great way to instantly add interest to your scrapbook page. To use a gradient map, simply choose two or more colors, and then apply the gradient map effect to your layer. This will create a smooth transition between the colors, and can add a lot of dimension to your page.
3. Layer patterned papers. One of the easiest ways to add color to your scrapbook page is to layer patterned papers. This is a great way to add a pop of color, without having to worry about matching colors perfectly. Simply choose a few patterned papers that you like, and layer them on top of each other. You can also use a die-cut machine to cut out shapes from the paper, and then layer those on top of each other.
4. Use a blending mode. Blending modes are a great way to add interest to your scrapbook page. There are a variety of blending modes available, each of which will create a different effect. Some of the most popular blending modes are “multiply”, “screen”, and “overlay”. To use a blending mode, simply choose the mode you want to use, and then apply it to your layer.
5. Add embellishments. Adding embellishments is a great way to add color and interest to your scrapbook page. Embellishments come in a variety of colors and sizes, so you can easily find ones that match your color scheme. You can also use a variety of mediums to add embellishments, such as ribbon, buttons, and beads.
 quickpage by Marisa Lerin
3.Use two colors at once for a more dimensional look
When it comes to digital scrapbooking, one of the coolest things you can do is to use two colors at once for a more dimensional look. Here are a few ways you can do this:
1. Use a separate layer for each color. This is probably the easiest way to use two colors at once. Simply create a new layer for each color you want to use. Then, using the paintbrush tool, brush on the colors in the areas you want them. You can even use different brush sizes and shapes for each color to add some variety.
2. Use the gradient tool. The gradient tool is another great way to use two colors at once. To use it, simply select the two colors you want to use from your color palette. Then, using the gradient tool, drag from one color to the other. You can experiment with different gradients to get the look you want.
3. Use the color blending mode. This is a more advanced technique, but it can produce some really cool results. To use the color blending mode, simply create a new layer and fill it with the color you want to use. Then, select the layer beneath it and choose the color blending mode from the drop-down menu. This will blend the two colors together in a variety of ways, depending on the mode you choose.
4. Use a clipping mask. A clipping mask is a great way to use two colors together without actually blending them. To create a clipping mask, simply create a new layer and fill it with the color you want to use. Then, select the layer beneath it and choose the clipping mask option from the layer menu. This will allow the color on the top layer to show through in the shape of the layer beneath it.
5. Use a layer mask. A layer mask is similar to a clipping mask, but it allows you to control how much of the color on the top layer shows through. To create a layer mask, simply create a new layer and fill it with the color you want to use. Then, select the layer beneath it and choose the layer mask option from the layer menu. This will create a mask that you can use to control how much of the color on the top layer shows through. Using two colors at once can add some dimension and interest to your scrapbook pages. Experiment with the techniques mentioned above to find the ones that work best for you.

4.Create a custom brush
One way to use a digital brush in digital scrapbooking is to create a custom brush. This can be done by downloading a brush file from the internet, or from a program like Photoshop. Once the file is saved, open it in your editing program and select the “Brush Tool”. Select the “Brush Options” tab and click “Load Brushes”. Find the file you just saved and click “Open”. Photoshop will now load the new brushes. Now that the new brushes are loaded, experiment with them to see which ones you like the best. Once you have a brush you like, you can use it to create a custom brush.
To do this, select the “Brush Tool” and then click on the “Brush Options” tab. Select the “Brush Tip Shape” tab and then click on the “Dynamics” tab. Under “Shape Dynamics”, select “Pen Pressure” from the “Control” drop-down menu. This will allow you to control the amount of pressure you apply to the brush. Now that you have your custom brush, you can use it to create anything you want in your scrapbook. Use it to add embellishments, journaling, or even Backgrounds. The possibilities are endless!

5. Experiment with different brush settings
There’s no denying that digital scrapbooking is all the rage these days. If you’re new to the world of digital scrapbooking, or even if you’re a seasoned pro, you might be wondering how to best use digital brushes in your scrapbooking projects. Here are five tips to help you get the most out of your digital brushes.
1. Pay attention to brush size When you’re working with digital brushes, one of the most important things to consider is brush size. Depending on the project you’re working on, you’ll want to use a brush that’s appropriate for the task at hand. If you’re working on a detailed project, you’ll want to use a smaller brush, whereas a larger brush might be better suited for a more general project.
2. Consider brush opacity Another thing to think about when you’re using digital brushes is opacity. Depending on the effect you’re going for, you might want to use a brush that’s more or less opaque. If you’re looking to create a more subtle effect, you’ll want to use a less opaque brush, whereas a more opaque brush will create a more dramatic effect.
3. Think about brush hardness When you’re selecting a digital brush, you’ll also want to think about hardness. Depending on the project you’re working on, you might want to use a harder or softer brush. A harder brush will create a more defined effect, while a softer brush will create a more blurred effect.
4. Experiment with different brush settings One of the best things about digital brushes is that they offer a lot of flexibility when it comes to settings. Depending on the look you’re going for, you can experiment with different brush settings to find the perfect look for your scrapbooking project.
5. Have fun! Above all, remember to have fun when you’re using digital brushes in your scrapbooking projects. There’s no right or wrong way to use them, so feel free to experiment and see what works best for you.
6. Use a brush to add texture
There are a few different ways that you can use digital brushes to add texture to your digital scrapbook pages. You can use them to create background patterns, to add embellishments, or even to create your own
Use a brush to add textures One way you can use brushes to add texture is by creating your own background patterns. This is a great way to add some dimension to your pages and make them really stand out. You can use a solid color brush and experiment with different strokes and speeds to create interesting patterns. Or, you can use a textured brush to create a more subtle background. Another way to use digital brushes is to add embellishments to your pages. This is a great way to add some extra interest and detail.
You can use brushes to create borders, to add flourishes, or even to create your own embellishments. Finally, you can use digital brushes to create your own textures. This is a great way to add some unique details to your pages. You can use brushes to create denim textures, to create wood grain textures, or even to create your own paper textures. Experiment with different brush sizes and opacities to get the perfect texture for your page.

7. Use a brush to add a finishing touch
There are a few ways that you can use brushes to add a finishing touch to your digital scrapbooking layouts. One way is to use a brush to create a border. Just create a simple border around your layout using a brush. You can also use a brush to create a frame for your layout. Another way to use a brush is to add some embellishments to your layout.
You can find all sorts of embellishments that come in brush form. Just add them to your layout wherever you want them. You can also use a brush to add some journaling to your layout. Just create a little box for your journaling and then use a brush to add some embellishments around it. Or, you can use a brush to create a background for your journaling. Just brush some color or patterns onto your layout and then add your journaling on top.
Finally, you can use a brush to add some shadows to your layout. This can really help to make your layout pop. Just add some shadows around your elements and then brush them into place. This is a great way to add some dimension to your layout. So, those are just a few ways that you can use a brush to add a finishing touch to your digital scrapbooking layouts. Just experiment and see what looks best for your layout.
There are many ways to use digital brushes in digital scrapbooking. Some people use them to createbackgrounds, while others use them to add embellishments to their layouts. However you choose to use them,digital brushes can help you add a unique and personal touch to your scrapbook pages.
 by Oliver Goldsmith (1730-1774). Digitally enhance")